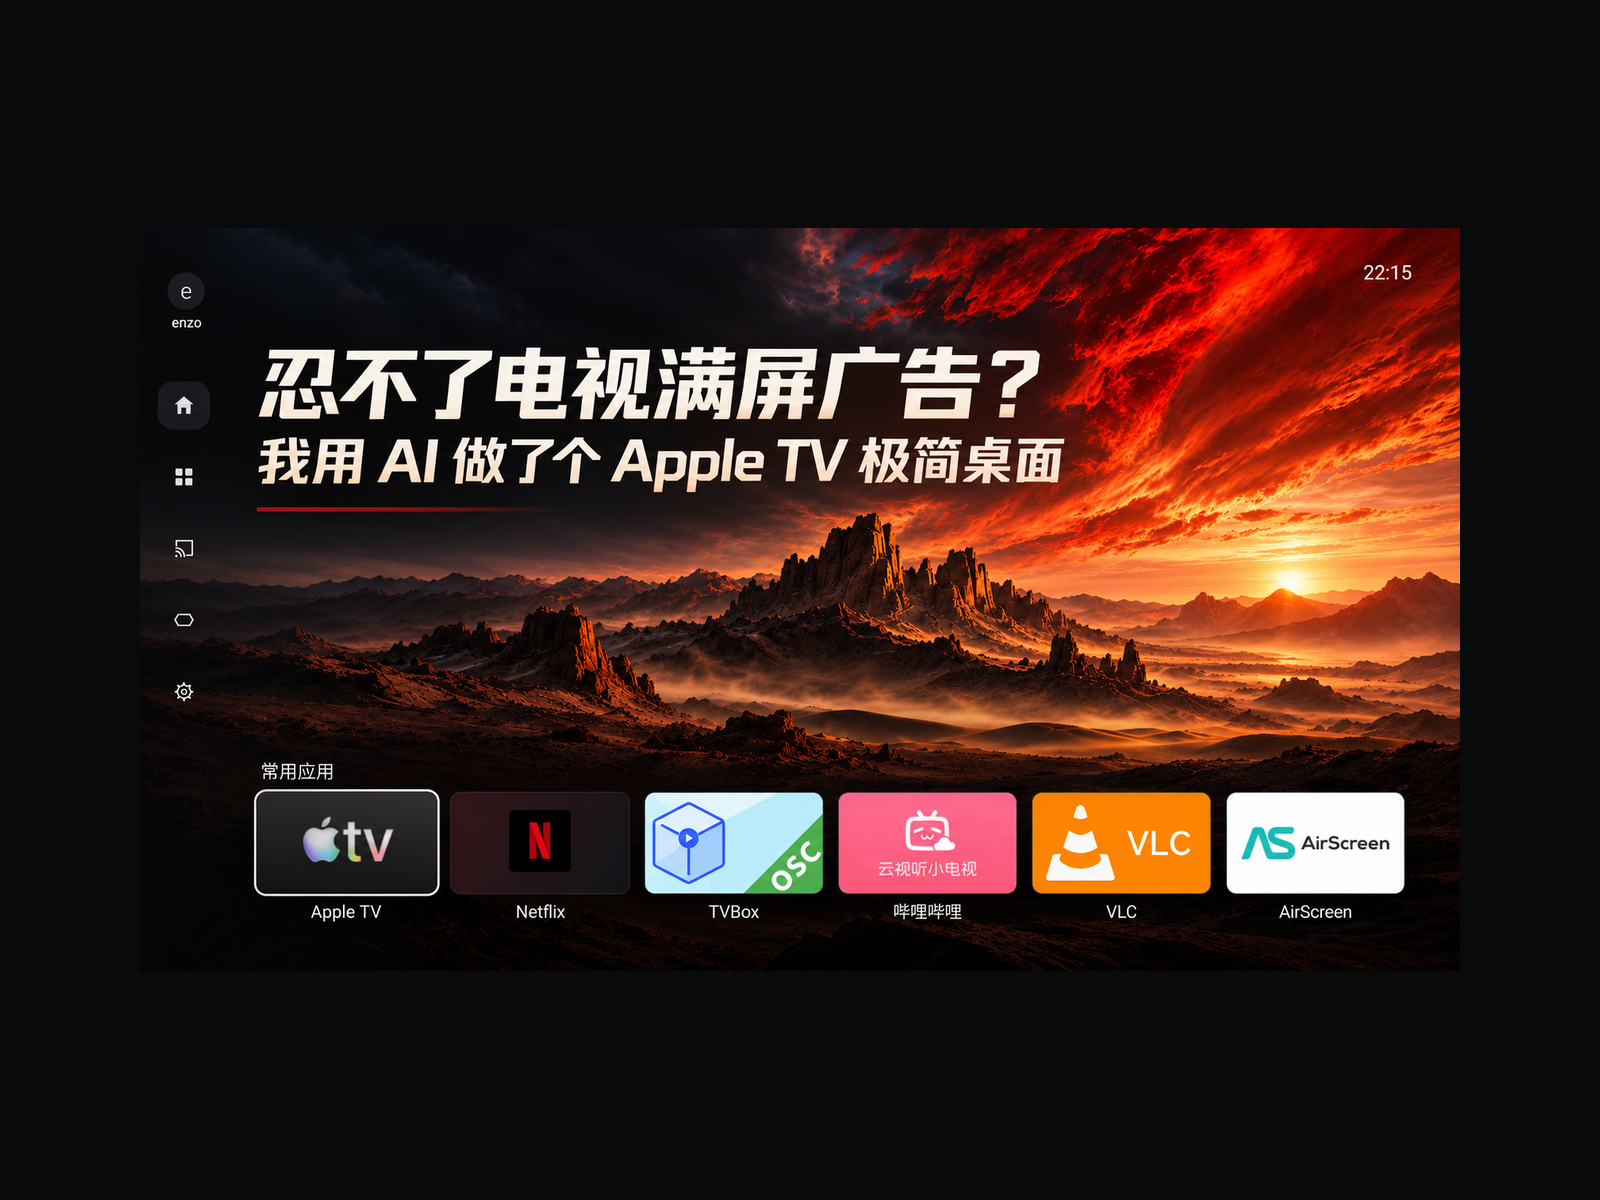
Switch on a smart TV and you get recommendations and feeds you can’t turn off, while the apps you actually installed are buried somewhere. What I wanted was simple: a wallpaper I liked, with a neat row of my usual apps along the bottom. A few days ago, I used Codex and a reference image to build a custom launcher for the FFALCON TV at home.
I. Hardware Requirements Before You Start
1. Device environment: I tested this on Android. You don’t need to draw the line too narrowly, though. If your TV supports an ADB connection, or any other way to communicate with a computer and install an app, it’s worth trying. For a completely closed system, an external TV box is another option.
2. Default-launcher permissions: being able to install a launcher does not mean you can make it the startup default. The device tested in this article was a FFALCON TV running Android 11.
II. Three Things to Prepare
1. A computer: for running local commands and building the APK.
2. A reference image: this sets the visual direction for the launcher. Pick one from Pinterest.
3. An AI coding assistant: I usually use Codex. DeepSeek, Claude, Cursor or whichever tool you prefer will also work, as long as it can read and write files and run commands. Getting started is generally straightforward.
Here’s the finished result first: a screenshot of the launcher installed and running on the actual TV.
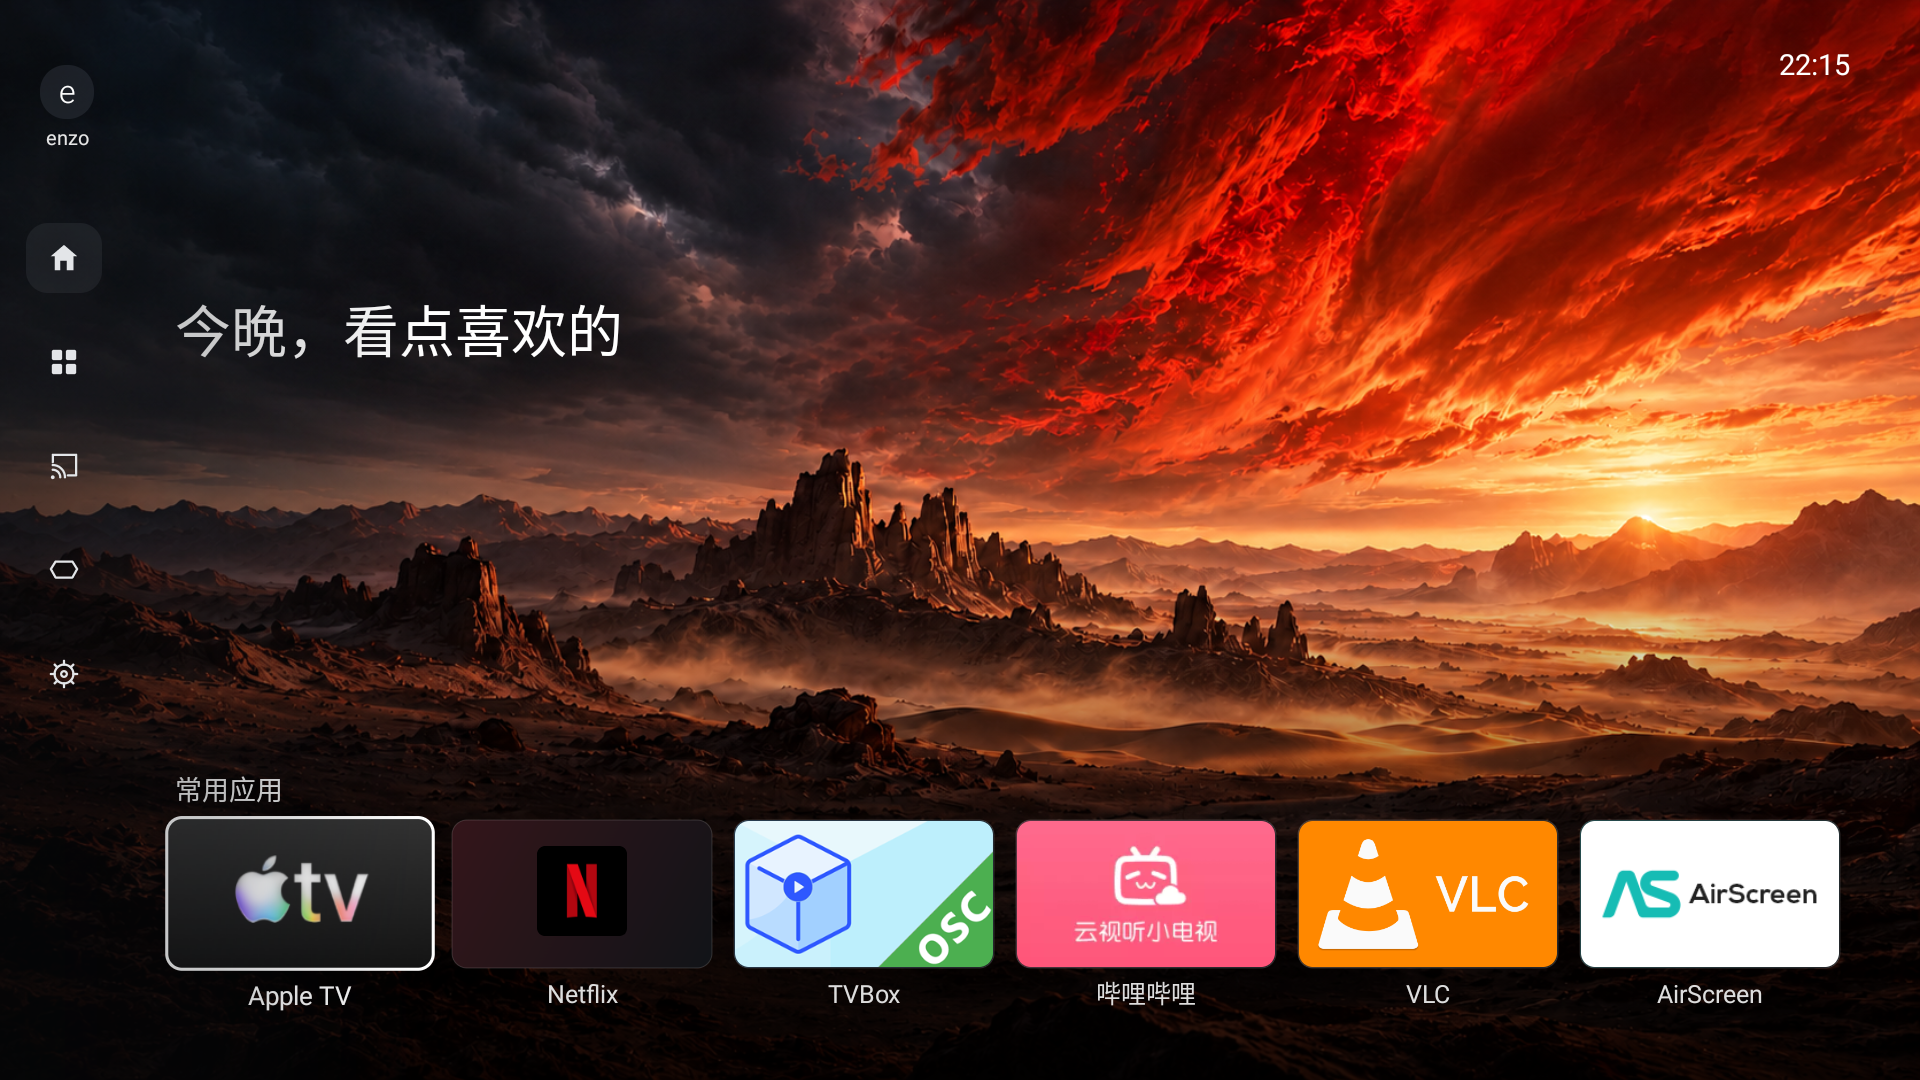
01Set Up the AI Coding Environment
1. Choose your tool: I used Codex. Sign in through its client; see the official Codex instructions. The same approach works with DeepSeek, Cursor, Claude and other coding assistants, without any special hurdle.
2. The core rule: settle the visual design before writing the project code. An ordinary browser chat window can’t compile and package an APK directly. You need a coding agent that can work with local files and terminal commands.
02Find a Reference and Finalize the Design
Inventing a layout from scratch takes time. The simplest approach is to use a well-designed TV interface as your visual reference. Search Pinterest for TV UI design or Android TV launcher, then choose an interface whose look and layout you like.
Step 1: Choose a Reference and Send the First Prompt
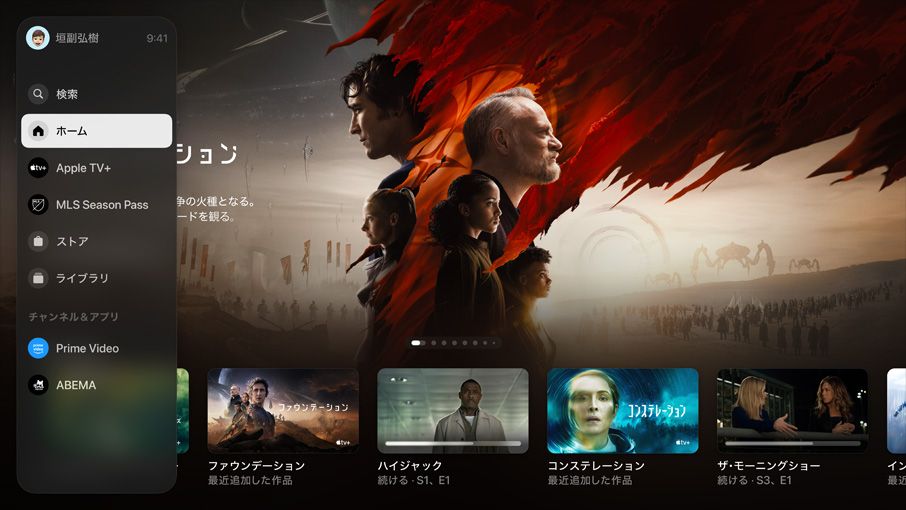
I chose this Apple TV screenshot for its structure: a minimal left sidebar, a spacious full-screen wallpaper and floating cards along the bottom. Save the reference, drag it into the conversation and send the first prompt together with the image:
Use the image I uploaded as a reference to design a landscape launcher UI for my TV.

TV model: [e.g. FFALCON Crane 6 Pro / enter the actual model]
Apps to keep on the home screen: [enter the apps you use most often]
Design elements I like: [e.g. a minimal left sidebar, a spacious wallpaper background and floating cards along the bottom]

Core requirements:
1. First use an image-generation tool to produce a 16:9 visual preview. If this environment cannot generate images directly, say so clearly; I will create an image separately and provide it.
2. Design for viewing a large screen from a distance. Support the remote’s up, down, left, right, OK and Back controls. Keep permanent access to the full app list, system settings, input-source switching and the original factory launcher. Only show apps that are actually installed on the home screen.
3. If you need system information, first tell me where to find it on the TV. Do not connect to the TV at this stage. Wait until I approve the final visual design before writing code.
Step 2: Iterate and Approve the Visual Design
1. The first draft: the AI’s first image already used my name and usual apps, but the left sidebar was too wide and looked heavy:
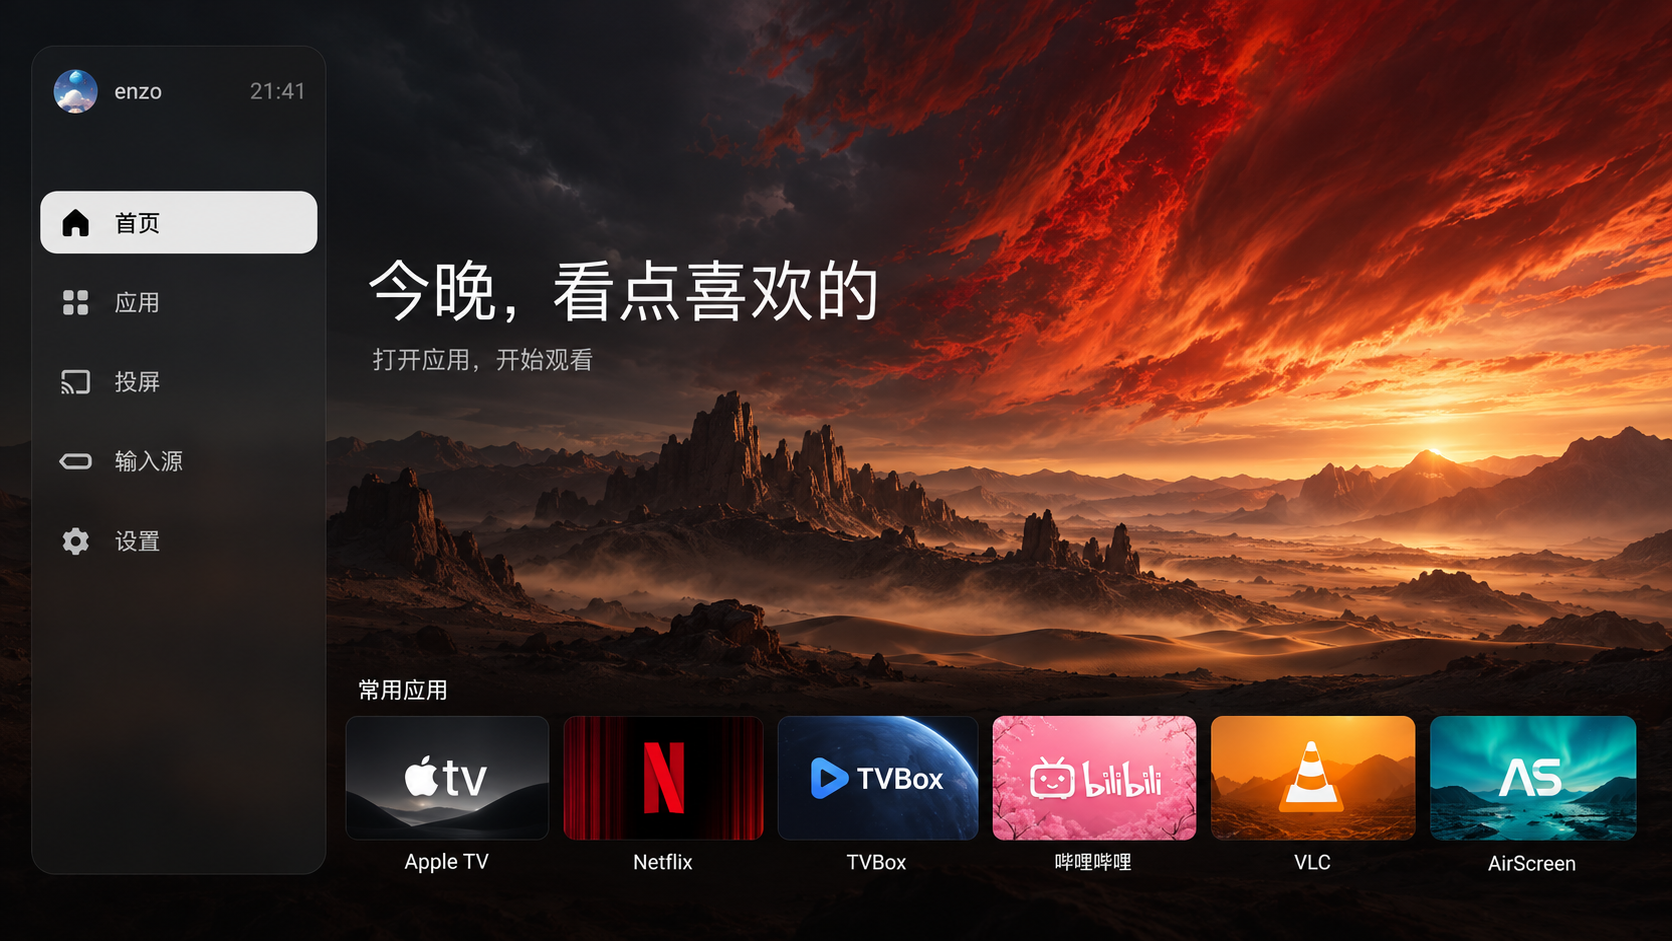
2. Make specific adjustments: changes are easiest while you’re still generating images. Tell the AI exactly what looks wrong:
“Make the gradient more transparent, and don’t make it so wide.”
3. Approve the final draft: the second version narrowed the sidebar, immediately making the large-screen layout feel more open. We also settled the interaction: show small icons normally, then reveal the labels when the focus moves onto them. Design approved!
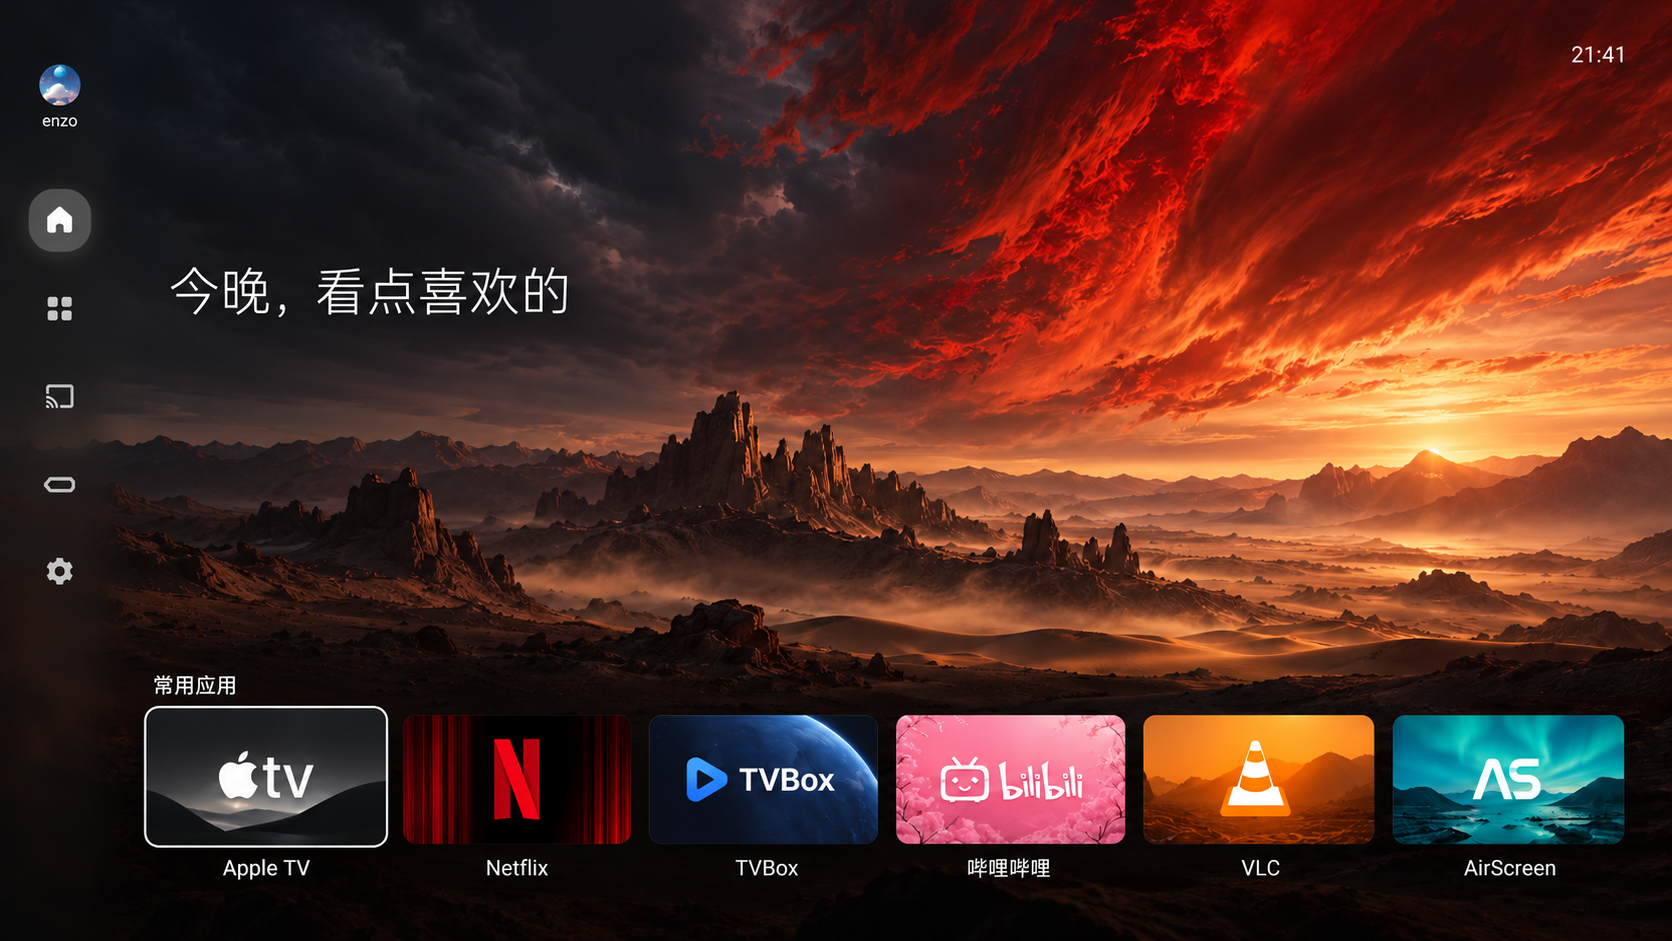
03Write the Code and Build the APK
Once the visual design is approved, ask the AI to write the Android code and build the package. On my TV, Apple TV, Netflix, TVBox, Bilibili, VLC and AirScreen stay on the first screen; everything else goes in the full app list. Direct access to system settings and input sources stays available throughout, without changing underlying system components or existing data.
Step 1: Send the Build Instructions
I have approved this visual design. Please develop an Android launcher app adapted to this TV model.

Core requirements:
1. Remote control: fully support the TV remote’s directional buttons. Focus highlights and selected states must be obvious. If an app fails to launch, show a clear error dialog. Adapt system settings and input-source switching to the actual model; explain unsupported features and offer alternatives.
2. Build deliverables: complete the project build and provide the compiled APK, full source code and local setup instructions. Check the computer for the required build tools first, and only guide me through installation if anything is missing. Keep the signing-key file safely within the project.
3. Safety: complete everything that can be tested locally on the computer first, and report the actual results. Do not connect to the TV at this stage. Do not disable the factory launcher, delete system components or clear any user data.
Step 2: Check the Deliverables
1. Confirm the APK exists: check the project directory for an exportable .apk installation file.
2. Keep the full source code: leave it in the project folder. If you want a different wallpaper or need to add or remove shortcut apps later, return to the project and ask the AI to rebuild it. There’s no need to start over.
04Install over the LAN and Test on the TV
Design and compilation happen entirely on the computer, so they don’t interrupt anyone watching TV. Wait until the TV is free, then install and test wirelessly over your local network.
Step 1: Set Up Wireless ADB on the LAN
1. Use the same Wi-Fi network: make sure the computer and TV are on the same network.
2. Enable developer mode: on the TV, open “Settings > About > Version information” and press the version number several times to enable developer mode.
3. Enable network debugging: turn on “Network debugging” or “Wireless debugging” in developer options. If you can’t find it, take a photo with your phone and ask the AI to identify it.
4. Authorize the computer: when the TV shows a debugging authorization dialog, select “Always allow” and confirm. Official ADB documentation
Step 2: Send the On-Device Deployment Instructions
You may now connect to my TV over the local network.

Steps and safety boundaries:
1. Identify the device: first read and record the model, Android version, screen resolution, installed app package names and current default-launcher component. Make sure every action targets only this device.
2. Install safely: first list the installation steps, on-device test procedure and rollback/recovery plan for my approval. After installation, launch it only as an ordinary app for testing. Do not replace the default launcher directly, disable the factory launcher or clear system data.
3. Disclose changes: separately flag any action that changes defaults, modifies system services or restarts the TV, and obtain my authorization first. Finally, write a local usage guide covering the changes made, one-command recovery instructions, and the paths to the APK and source code.
Step 3: Four On-Device Acceptance Checks
1. Start it as an ordinary app: open the new launcher manually from the TV’s “All apps” list. Don’t replace the system default at the outset.
2. Check every function: test directional focus movement with the remote, launching each app, opening HDMI input sources and settings, and returning to the factory launcher.
3. Set the default launcher: if the system provides a “Default launcher” option, use it. If the option is hidden, ask the AI for a safe replacement approach for your specific model and firmware. Do not gamble by freezing or disabling the factory launcher.
4. Test all three startup states: press the remote’s Home button, wake the TV from standby, and perform a cold start after disconnecting power. Confirm that all three reliably open the new launcher.
Step 4: Cleanup
Cleanup and safety: after testing, turn off TV debugging and back up the source code and recovery scripts. Replacing the launcher removes the clutter of home-screen recommendations, but it cannot remove the TV’s hardware startup ads or ads inside video apps.
Further reading: CleanYourTV · Android TV remote navigation